
Hard drives crash. Sometimes they crash due to issues with their firmware, other times they crash simply due to how much data they have to process. Whatever the case may be, inevitably hard drive crashes will happen. For this reason, it’s a good idea to have an off-site backup in case your primary drive gets hit by a bus or something.
With that being said, a lot of people don’t know how to properly handle a hard drive when it crashes, which is why we’ve put together this guide on how to recover data from a damaged hard drive. Whether you’ve accidentally dropped it, or got knocked over in a clumsy moment, the truth is that the vast majority of hard drive failures can be fixed. This article will teach you how to do hard drive data recovery near me in case of an emergency.
Back up your data
The first step to recovering data from a hard drive is always backing up your data. This will prevent you from losing any important information if your drive does crash and you need to recover the data.
To backup your data, plug in an external hard drive to your computer and open it up. Next, open up the folder containing the files you want to back up. Copy these files and then paste them into your external hard drive’s corresponding folder. You can also save files as a .zip or .rar archive for easier storage. Once all of your files have been copied over, unplug the external hard set and store it somewhere safe.
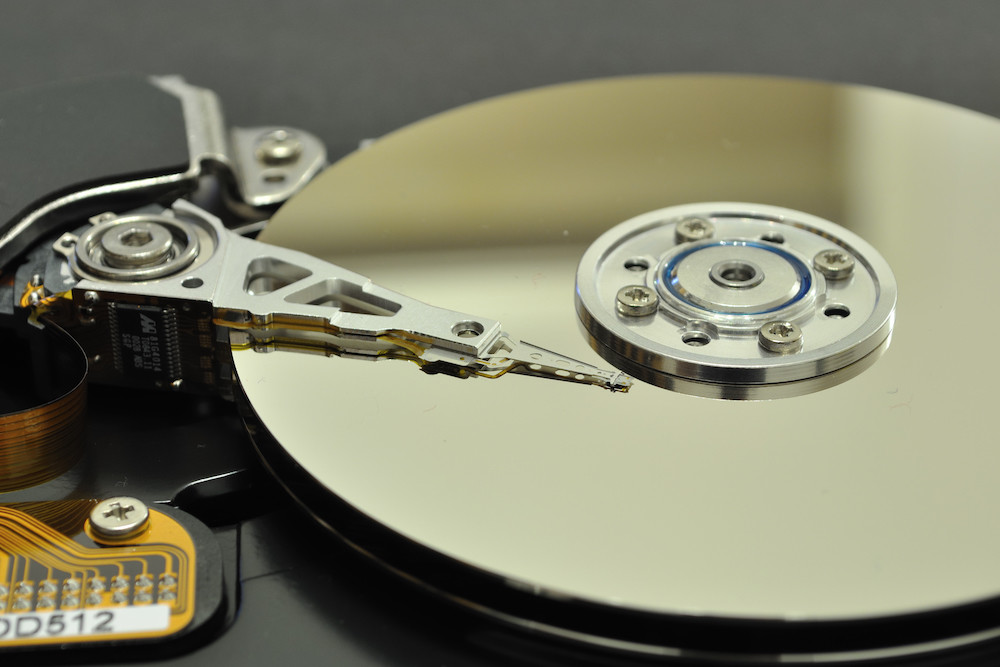
Remove your hard drive and memory
Remove the hard drive from your computer. This will require opening the case on your desktop and pulling out the drive. After you’ve removed the hard drive, remove any memory modules that may have come loose during the process.
Remove your hard drive
The first thing you need to do is remove the hard drive from your computer and put it somewhere safe like a desk or counter. Next, find a small Phillips screwdriver that will fit the screws on your hard drive but don’t use it just yet. Now, inspect the exterior of your hard drive to see if there are any external signs of damage – such as dents, cracks in the plastic casing, and so on. If you do find damage, we recommend going ahead and replacing your hard drive and skipping this entire article. If you don’t find any external signs of damage (or if they’re minor), take a deep breath and continue reading this guide.
Partition and format the drive
The first step is to partition and format the drive. This will be done through hard-drive management software. There are many such programs available for free on the internet, or you can use a program like Disk Management in Windows.
Once you’ve opened up your hard drive management software, you’ll see your damaged hard drive listed with a red X through it. You should select it, then click on “partition and format” to get rid of any data that might still be on there and make the best of what’s left. This process may take a while, but once it’s done, you should have a healthy hard drive once more!
The NAND flash method
The NAND flash method is a fix for any number of issues with a hard drive, including failure to read or write data. The good news is that this method works in almost every situation where the hard drive has crashed.
This method fixes the following errors:
-Infected file system errors
-Incorrect partition table entries
-Incorrect boot sector errors
-Corrupt FAT tables
-Bad blocks due to physical damage on the device
The first step when trying this fix is to make sure the power connector is connected securely and then remove any other connections to the hard drive. You may have to unscrew the screws holding it into place as well. Once you’ve done this, go ahead and connect your cable to your computer and plug in your external enclosure. Next, insert the hard drive into its bed, making sure it fits snugly. Then take a look at what your computer screen says; if it doesn’t say “Ready” then press Enter on your keyboard until you get there. This will give you access to your data without having to use an expensive data recovery service!
The SCSI method
If your hard drive is still spinning, then you can use the SCSI (Small Computer System Interface) method. This process will take up to 30 minutes and involves connecting two computers with a transfer cable. The computer on which the hard drive crashed will be called Computer A, while the one that you’ll be using to recover data from the hard drive will be called Computer B.
1. Turn off both Computers
2. Remove all cables from Computer A
3. Connect one end of the transfer cable in Computer A’s back panel to Computer B’s back panel
4. Connect one end of the other transfer cable in Computer B’s front panel to the damaged HDD
5. Turn on both computers
6. Wait for Windows to boot on both computers and then check if it can find a partition on the HDD
The SATA method
If your hard drive has been fried, there is a good chance it will be considered unreadable. This can be devastating for any business that relies on its data, as it means you’ll have to go through the process of reinstalling all programs and data. Luckily there are some simple methods that can help you recover your data from a damaged hard drive in 30 minutes or less. One such method is called the SATA method, which requires the use of an external hard drive enclosure, screwdriver and a large metal washer.
The first step is to open up your damaged computer’s case and locate the power supply unit (PSU). It will be either on the floor or at the bottom of your desk. Next, find the SATA connector from inside your PSU where it plugs into your hard drive – this may vary based on what version of PSU you have so make sure you check before proceeding with this process.
Finally, remove the cover from your PSU by unscrewing it using a Phillips head screwdriver and then remove one of its cables – typically anything with black wires or blue wires is fine. Place this cable into the back of the metal washer while being careful not to bend any of its pins and then attach one end to each side of an external hard drive enclosure – if you don’t have an external enclosure handy then just attach it to another piece of metal! After attaching those two ends together, plug in a SATA power cable into both sides and connect them to
The USB method
If your hard drive has crashed and you can access it via another computer, then the first thing you should do is attach it to a USB port. Be sure to use a powered USB port on the back of your desktop or laptop. If you don’t have an available one, you can purchase a USB extension cable for cheap on Amazon.
As soon as you plug it in, Windows will automatically detect that there’s a hard drive there and offer to let you scan for errors on it. You’ll want to click through these steps and when asked if your PC can fix anything, choose “No, I want to fix them myself” or “Yes, try to fix them automatically”. This will allow you to repair any errors found with the hard drive.
Once that process is over, unplug the hard drive from the USB port using the same steps used previously and attach it again in Windows Explorer (find Computer on your start menu). You should see different files this time around! Congratulations! You’ve successfully recovered data from a damaged hard drive!
Conclusion
Don’t risk losing your valuable data. From recovering data from a damaged hard drive in 30 minutes to partitioning and formatting your drive, we have all the tips you need to get your data back and stay on top of your game.